Facebookアプリケーションをレビューに提出する方法
Facebookアプリケーションをレビューに提出する前に、Facebookアプリケーションを作成し、LiveAgentとFacebookを連携させる必要があります。その手順についてはこちらのガイドをご参照ください。
クイックナビゲーション
LiveAgentがウォール投稿の取得・作成、プライベートメッセージやコメントの取得・返信を行うには、上級アクセス(Advanced Access)の特別な権限が必要です。これらの権限はデフォルトでは標準アクセスのみが付与されているため、まず上級アクセスをリクエストし、Facebookチームによる承認のためアプリケーションを提出する必要があります。
Facebookアプリの管理者であれば、以下の権限に対する標準アクセスで十分です。このガイドは、Facebookアプリの管理者として設定されていない他のLiveAgent管理者がFacebookアプリを連携できるようにする場合にのみ適用されます。
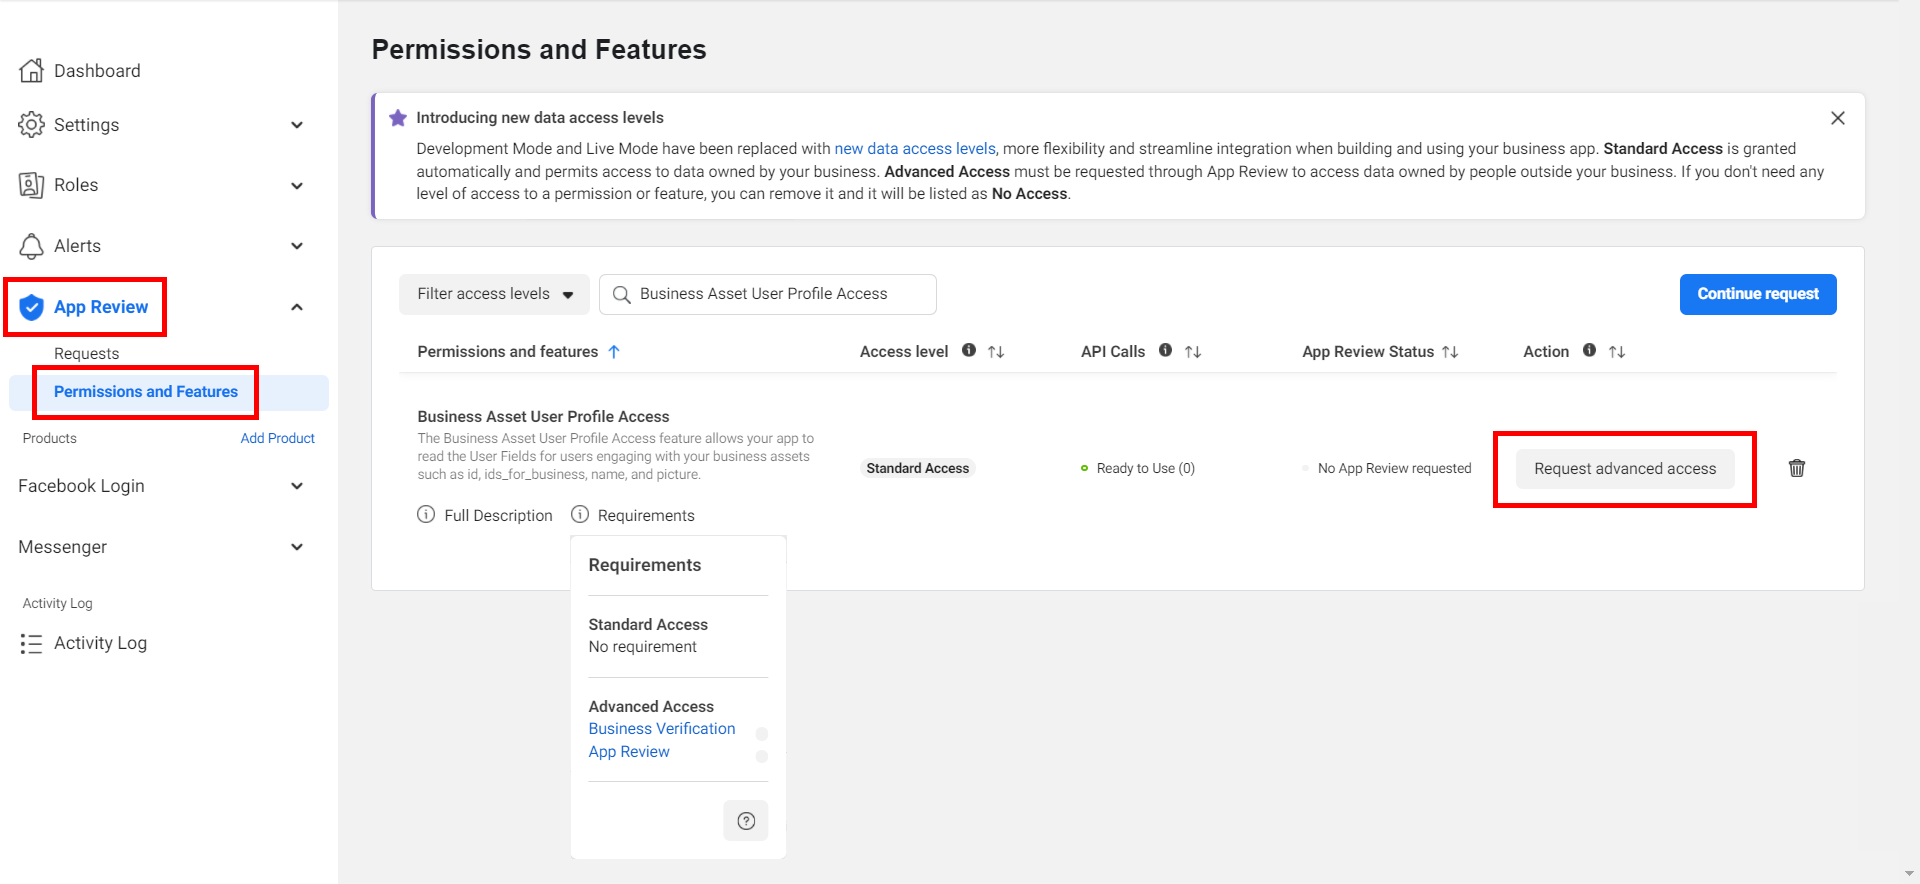
上級アクセスのリクエスト
Facebook開発者パネルで “App Review > Permissions and Features” に移動し、LiveAgentが必要とする以下の8つの権限について上級アクセスをリクエストしてください。
- Business Asset User Profile Access
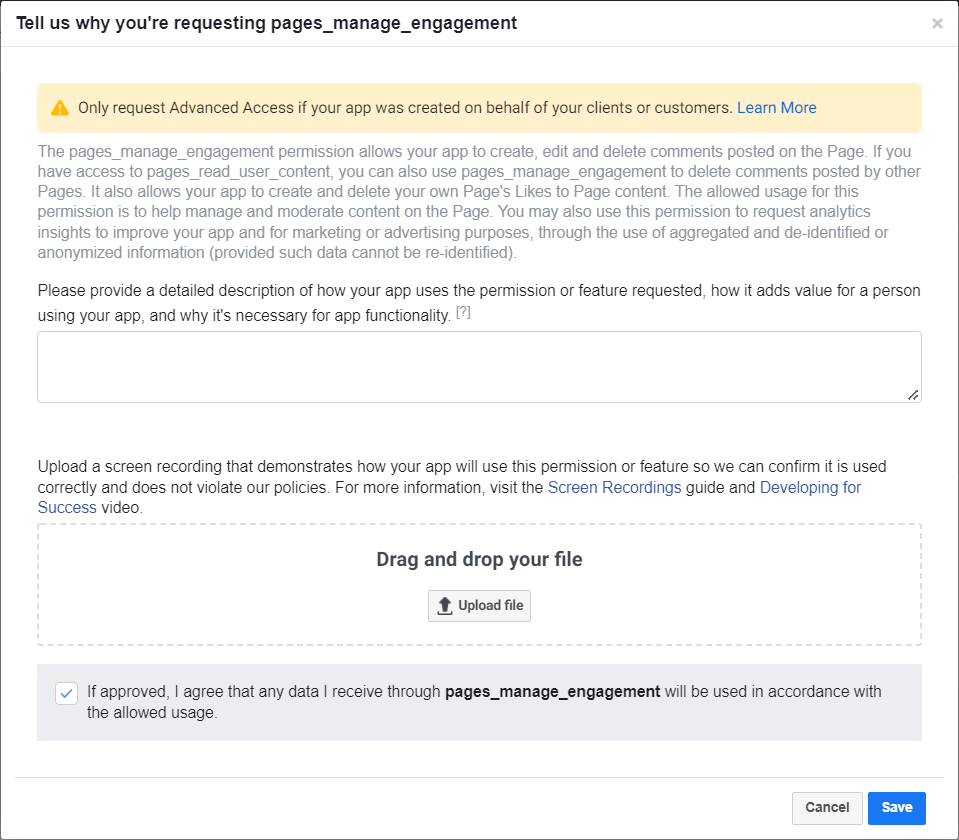
- pages_manage_engagement
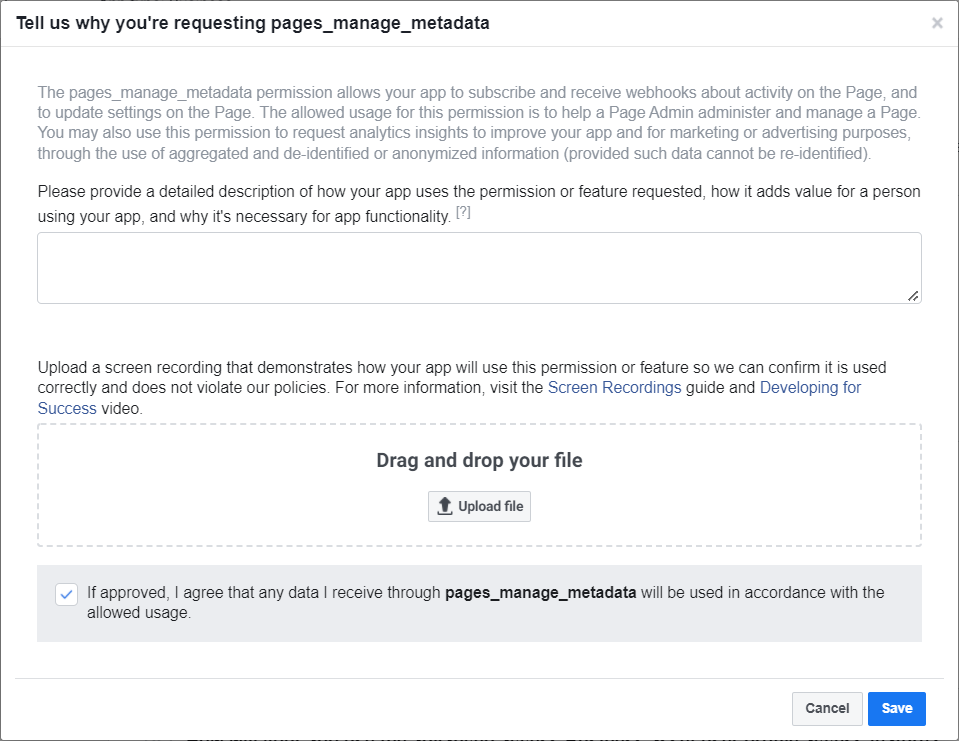
- pages_manage_metadata
- pages_manage_posts
- pages_messaging
- pages_read_engagement
- pages_read_user_content
- pages_show_list
必須ではありませんが、関連性があり役立つ可能性のある追加権限が3つあります。
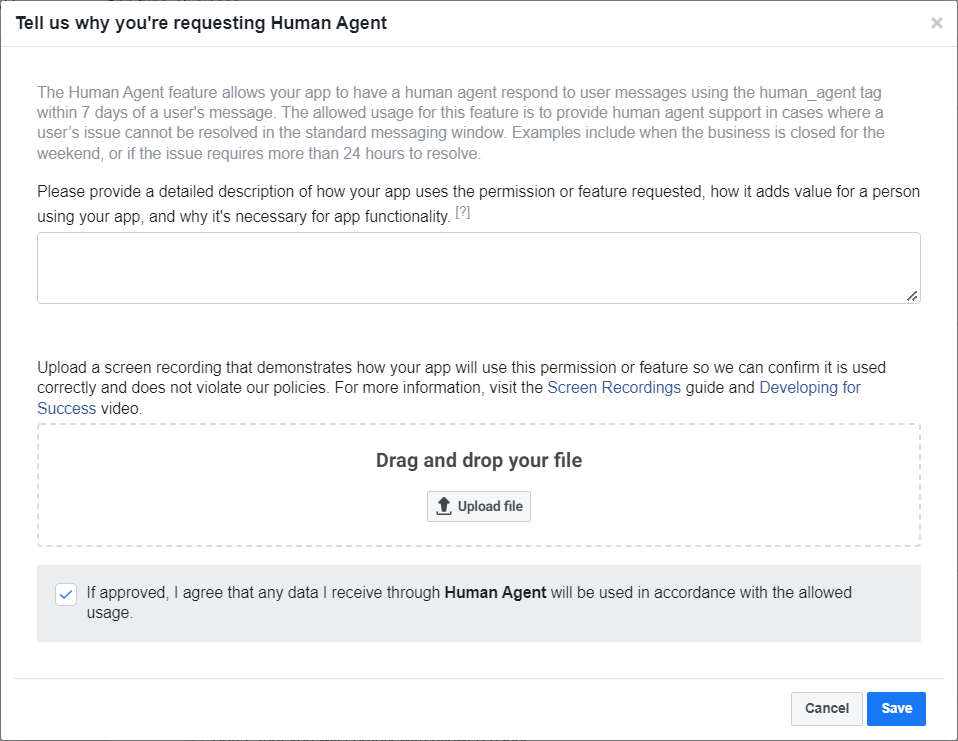
- Human Agent(LiveAgentからFacebookメッセージに7日以内に返信できるようにします。標準の制限は24時間です)
- instagram_basic(アプリがInstagramアカウントのプロフィール情報やメディアを読み取れるようにします)
- instagram_manage_comments(Facebookアカウントに連携されたInstagramアカウントへのコメントやメンションの取得・返信を可能にします)
なお、これらの上級アクセス権限はすべてビジネス認証が必要になる場合があります。ビジネスの認証が行われていない場合、アプリケーションのレビューは却下される可能性が高くなります。個人認証では不十分な場合があります。
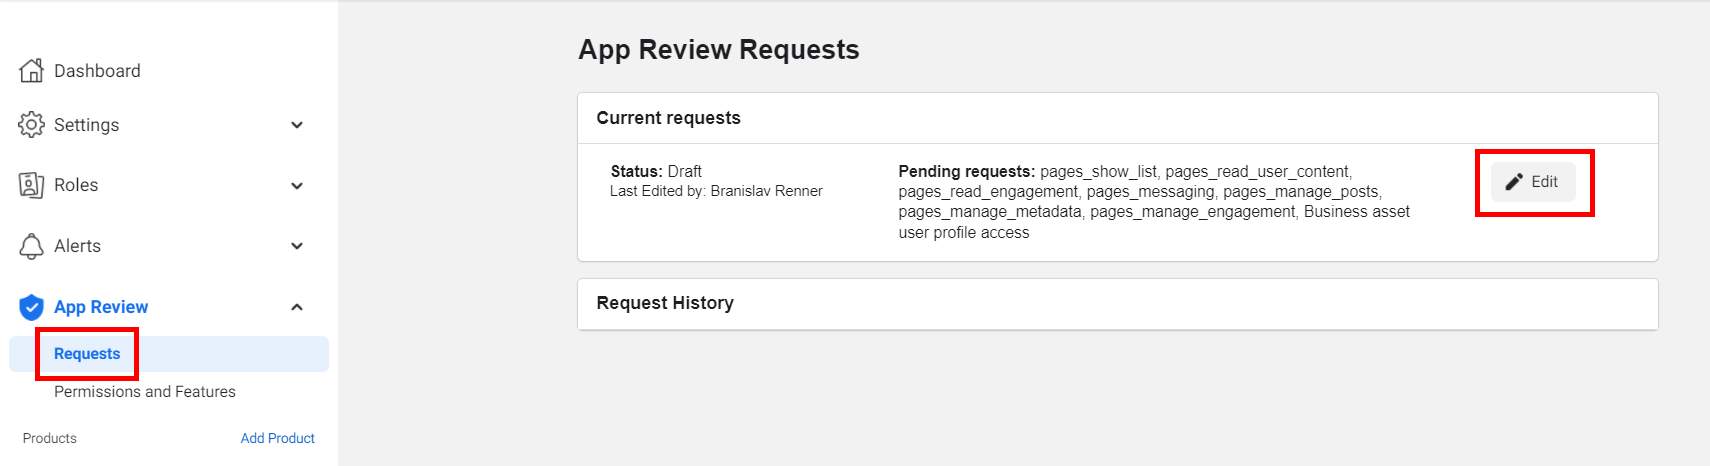
レビュー申請の送信
必要なすべての権限について上級アクセスをリクエストした後、メニューの “App Review > Requests” セクションに移動し、保留中のリクエストを編集してください。
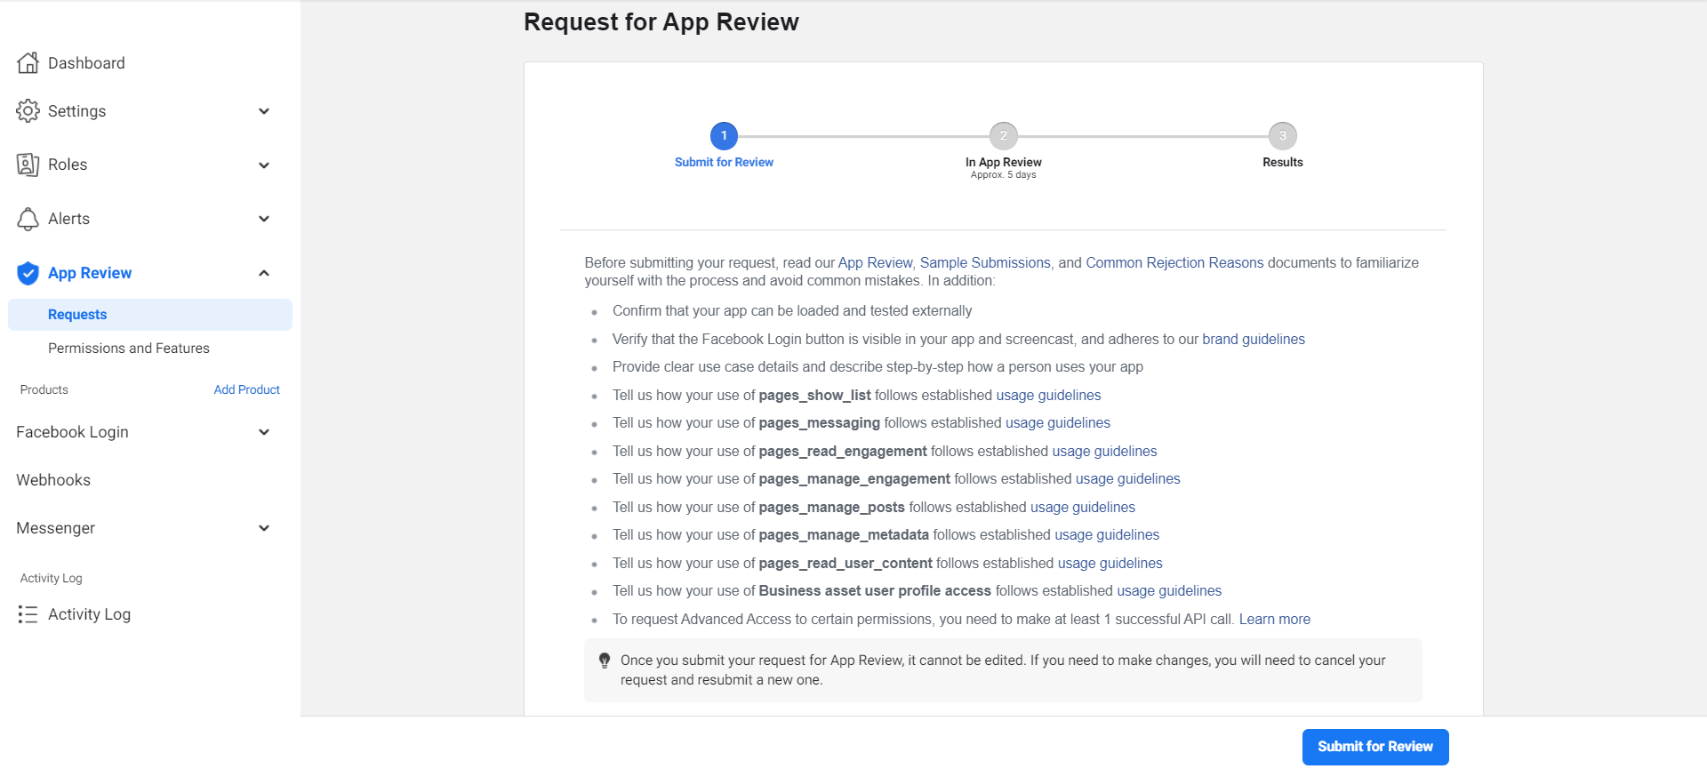
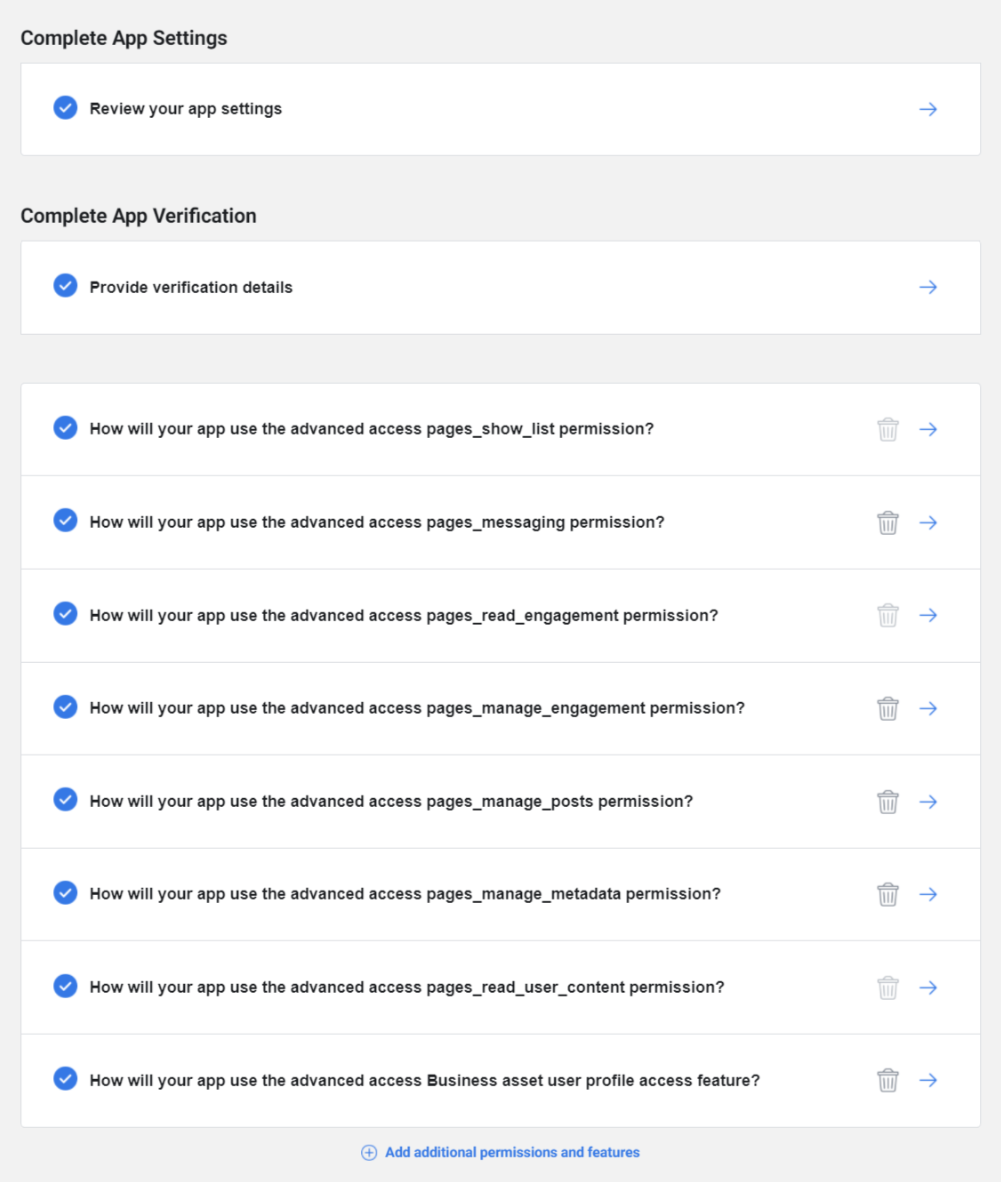
レビューに提出する前に、すべてのステップを完了し、リクエストした各権限の詳細を入力する必要があります。 レビュー要件を示すすべてのチェックマークが青色になると、ページ下部の “Submit for Review” ボタンが有効になり、アプリをレビューに提出できるようになります。
アプリレビューの各セクションへの記載例を用意しています。以下でご確認ください。
アプリレビューの各セクションへの記載例
ダミーの認証情報 “- url: https://support.mycompany.com/agent - username: support@mycompany.com - password: LiveAgent007” を、実際のセルフホスト型LiveAgentの管理者/オーナーアカウントの認証情報に必ず置き換えてください。
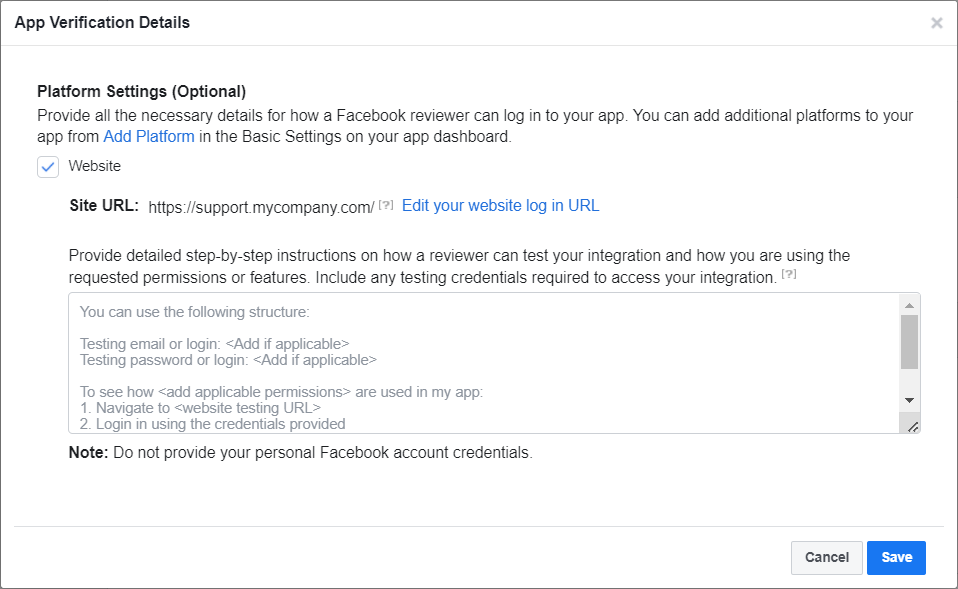
テキストエリアに以下の文章を入力できます。
The LiveAgent application can connect with Facebook pages to fetch page posts, comments and messages. After somebody writes a post, comment, or message to a Facebook page, it should appear in the LiveAgent application as a new ticket within a few seconds. Only users that are logged in can connect Facebook pages with LiveAgent.
- Inside LiveAgent, click “Configuration” on the left-hand side menu on the main application screen.
- From the “Configuration” screen click “Facebook” and “Application setup” under “Facebook.”
- In this section you need to connect a Facebook app created in developers.facebook.com/apps, with the following permissions with advanced access - pages_read_user_content, pages_manage_metadata, pages_manage_posts, pages_manage_engagement, pages_read_engagement, pages_messaging, pages_show_list, Business Asset User Profile Access.
- Then on the “Facebook pages” screen you can connect your Facebook page via the “Connect” button.
- A login dialog to Facebook will open in a new window.
- Fill in the login credentials and then click “Log in.”
- Next, a list with available Facebook pages will open.
- Select the Facebook page you want to connect and connect it with LiveAgent by clicking the “Connect” button.
- Now the Facebook page should be connected with LiveAgent.
- Head over to your Facebook page on Facebook.com
- Click on the “Send message” button and write any message to your Facebook page.
- Go back to LiveAgent’s “Tickets” screen and your message will appear here in the form of a ticket.
You can test it here:
- url: https://support.mycompany.com/agent
- username: support@mycompany.com
- password: LiveAgent007
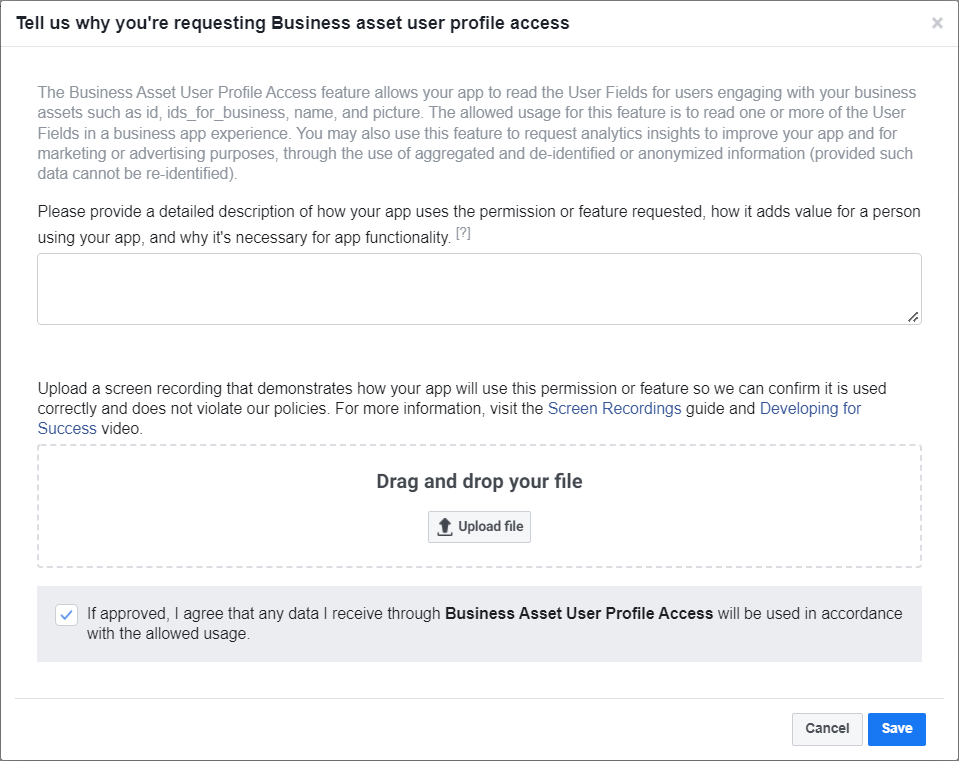
テキストエリアに以下の文章を入力できます。
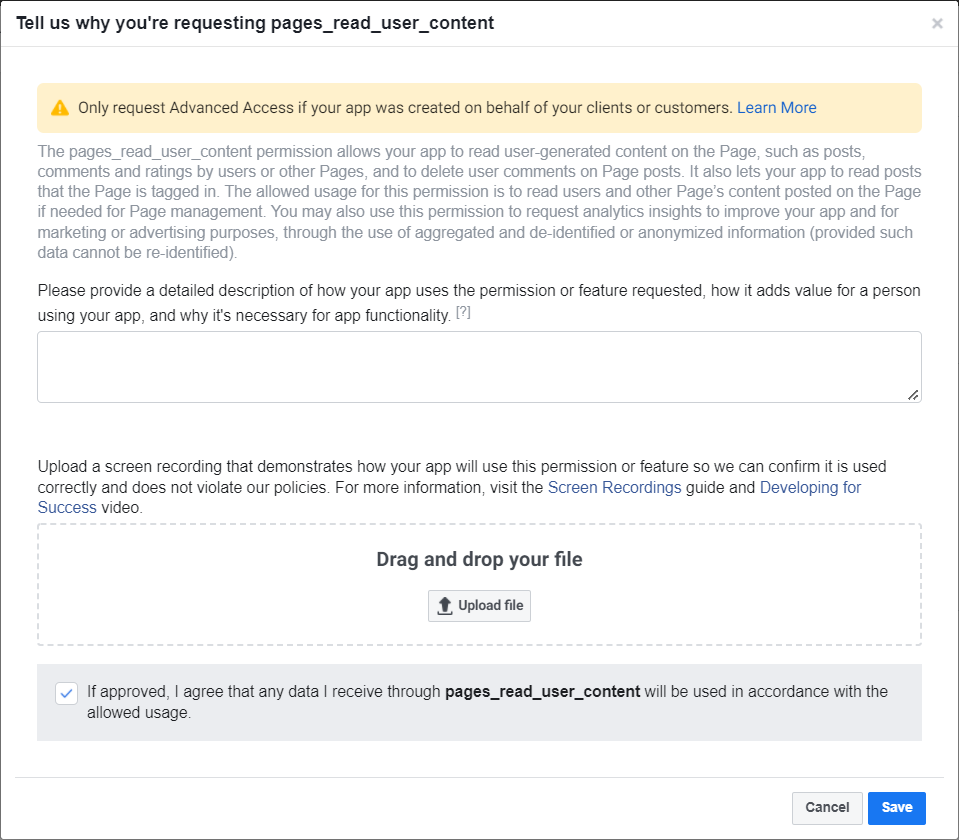
After connecting the Facebook page, we pull posts with their comments. This feature is needed to get the field from which we use the ids_for_business, picture and name. We need this permission to be able to react to and reply to comments posted by other pages or users under our posts. The LiveAgent application can connect with Facebook pages to fetch page posts, comments, and messages. After somebody writes a post, comment, or message to a Facebook page, it should appear in the LiveAgent application as a new ticket within a few seconds. Only users that are logged in can connect Facebook pages with LiveAgent.
- Inside LiveAgent, click “Configuration” on the left-hand side menu on the main application screen.
- From the “Configuration” screen click “Facebook” and “Application setup” under “Facebook.”
- In this section you need to connect a Facebook app created in developers.facebook.com/apps, with the following permissions with advanced access - pages_read_user_content, pages_manage_metadata, pages_manage_posts, pages_manage_engagement, pages_read_engagement, pages_messaging, pages_show_list, Business Asset User Profile Access.
- Then on the “Facebook pages” screen you can connect your Facebook page via the “Connect” button.
- A login dialog to Facebook will open in a new window.
- Fill in the login credentials and then click “Log in.”
- Next, a list with available Facebook pages will open.
- Select the Facebook page you want to connect and connect it with LiveAgent by clicking the “Connect” button.
- Now the Facebook page should be connected with LiveAgent.
- Head over to your Facebook page on Facebook.com
- Find any post on your page and try to write a comment.
- Go back to LiveAgent’s “Tickets” screen and you can now see your comment in the form of a ticket.
- Open the ticket with your message, press “Like”, and hit the “Reply” button to respond to the fetched comment.
You can test it here:
- url: https://support.mycompany.com/agent
- username: support@mycompany.com
- password: LiveAgent007
このガイドの末尾にある VIDEO_FB_LA_share-post-sub.mp4 に近い内容の動画を自分で録画し、ファイルエリアに添付してください。Facebookのレビュー担当者は、一般的な動画のみの提出を受け付けていません。
テキストエリアに以下の文章を入力できます。
We need this permission to create, edit and delete comments posted by the page, users, or other page. The LiveAgent application can connect with Facebook pages to fetch page posts, comments, and messages. After somebody writes a post, comment, or message to a Facebook page, it should appear in the LiveAgent application as a new ticket within a few seconds. Only users that are logged in can connect Facebook pages with LiveAgent.
- Inside LiveAgent, click “Configuration” on the left-hand side menu on the main application screen.
- From the “Configuration” screen click “Facebook” and “Application setup” under “Facebook.”
- In this section you need to connect a Facebook app created in developers.facebook.com/apps, with the following permissions with advanced access - pages_read_user_content, pages_manage_metadata, pages_manage_posts, pages_manage_engagement, pages_read_engagement, pages_messaging, pages_show_list, Business Asset User Profile Access.
- Then on the “Facebook pages” screen you can connect your Facebook page via the “Connect” button.
- A login dialog to Facebook will open in a new window.
- Fill in the login credentials and then click “Log in.”
- Next, a list with available Facebook pages will open.
- Select the Facebook page you want to connect and connect it with LiveAgent by clicking the “Connect” button.
- Now the Facebook page should be connected with LiveAgent.
- Head over to your Facebook page on Facebook.com
- Find any post on your page and try to write a comment.
- Go back to LiveAgent’s “Tickets” screen and you can now see your comment in the form of a ticket.
- Open the ticket with your message and hit the “Reply” button to respond to the fetched comment.
You can test it here:
- url: https://support.mycompany.com/agent
- username: support@mycompany.com
- password: LiveAgent007
このガイドの末尾にある VIDEO_FB_LA_share-post-sub.mp4 に近い内容の動画を自分で録画し、ファイルエリアに添付してください。Facebookのレビュー担当者は、一般的な動画のみの提出を受け付けていません。
テキストエリアに以下の文章を入力できます。
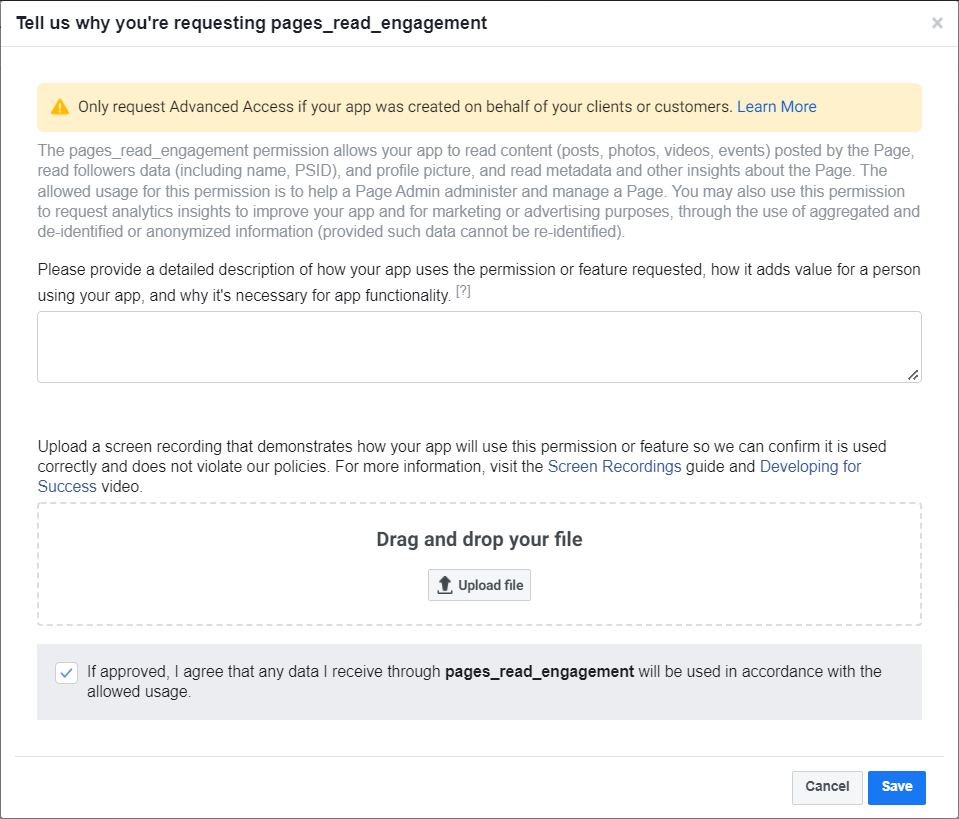
We need this permission to read information about accounts and also to subscribe and receive webhooks about activity on the Page. The LiveAgent application can connect with Facebook pages to fetch page posts, comments, and messages. After somebody writes a post, comment, or message to a Facebook page, it should appear in the LiveAgent application as a new ticket within a few seconds. Only users that are logged in can connect Facebook pages with LiveAgent.
- Inside LiveAgent, click “Configuration” on the left-hand side menu on the main application screen.
- From the “Configuration” screen click “Facebook” and “Application setup” under “Facebook.”
- In this section you need to connect a Facebook app created in developers.facebook.com/apps, with the following permissions with advanced access - pages_read_user_content, pages_manage_metadata, pages_manage_posts, pages_manage_engagement, pages_read_engagement, pages_messaging, pages_show_list, Business Asset User Profile Access.
- Then on the “Facebook pages” screen you can connect your Facebook page via the “Connect” button.
- A login dialog to Facebook will open in a new window.
- Fill in the login credentials and then click “Log in.”
- Next, a list with available Facebook pages will open.
- Select the Facebook page you want to connect and connect it with LiveAgent by clicking the “Connect” button.
- Now the Facebook page should be connected with LiveAgent.
You can test it here:
- url: https://support.mycompany.com/agent
- username: support@mycompany.com
- password: LiveAgent007
このガイドの末尾にある VIDEO_FB_LA_connect.mp4 に近い内容の動画を自分で録画し、ファイルエリアに添付してください。Facebookのレビュー担当者は、一般的な動画のみの提出を受け付けていません。
テキストエリアに以下の文章を入力できます。
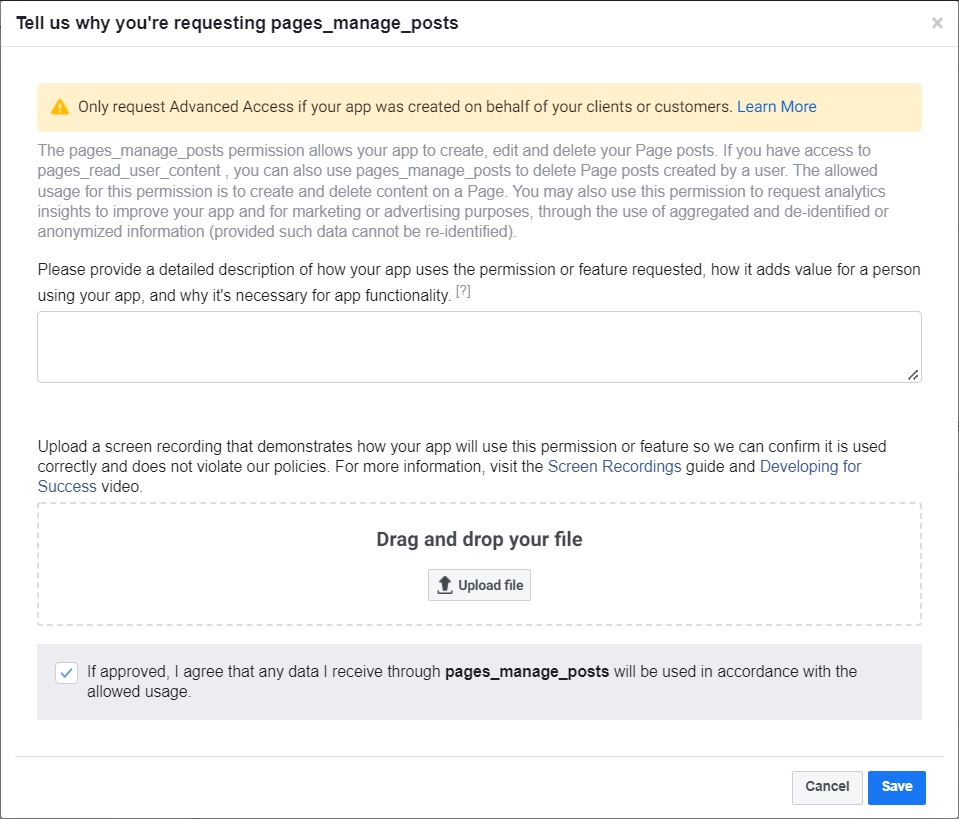
We need this permission to create, edit and delete content posted on the page (posts, videos, photos.) Users that are logged in can post statuses to pages via the LiveAgent application. Only users that are logged in can post anything to Facebook.
- Click the “New” tab in the top section of application screen.
- Select Compose Facebook post.
- Select which page you want to post on (shown only if there are more pages.)
- Write whatever you want to share with your audience.
- Click Send.
You can test it here:
- url: https://support.mycompany.com/agent
- username: support@mycompany.com
- password: LiveAgent007
このガイドの末尾にある VIDEO_FB_LA_share-post-sub.mp4 に近い内容の動画を自分で録画し、ファイルエリアに添付してください。Facebookのレビュー担当者は、一般的な動画のみの提出を受け付けていません。
詳細説明(1つ目の)テキストエリアに以下の文章を入力できます。
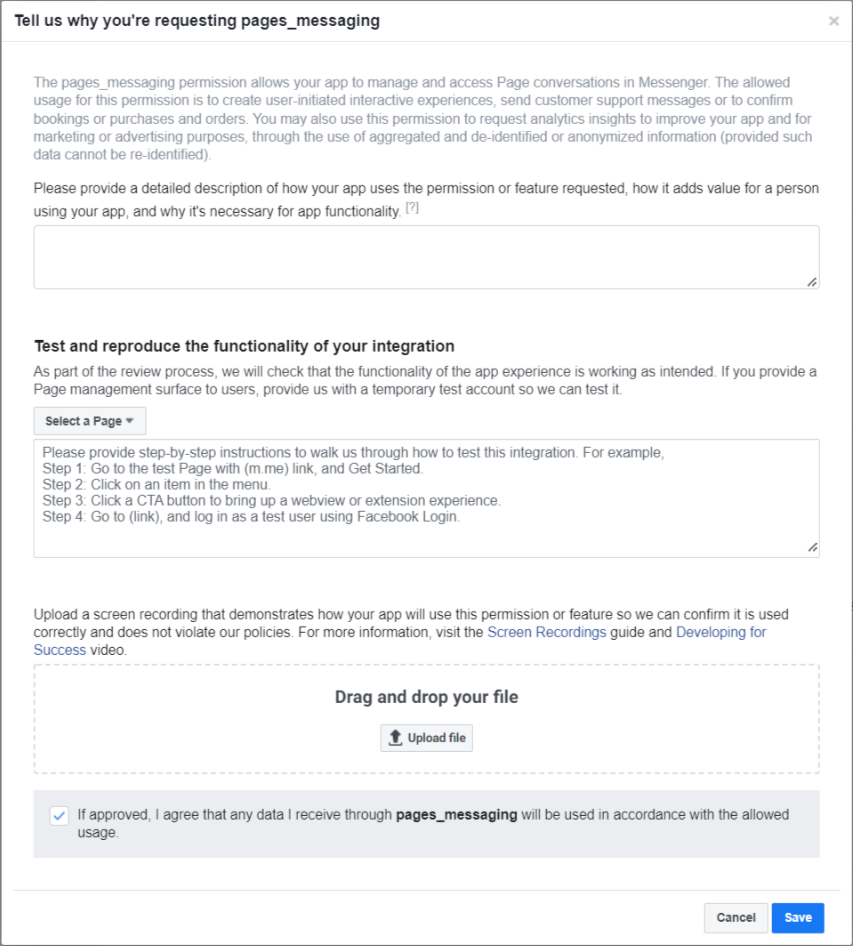
LiveAgent application reads from messages of connected Facebook pages and allows human agents to respond to customer messages.
テストと再現手順(2つ目の)テキストエリアに以下の文章を入力できます。
LiveAgent application is not a chatbot, it is a tool for human operators to simplify communication with customers over multiple channels in one application. The LiveAgent application can connect with Facebook pages to fetch page posts, comments and messages. Webhooks are used to fetch page messages. After somebody writes a post, comment or message to Facebook page, it should appear in the LiveAgent application as a new ticket within a few seconds. Only users that are logged in can connect Facebook pages with LiveAgent.
- Inside LiveAgent, click “Configuration” on the left-hand side menu on the main application screen.
- From the “Configuration” screen click “Facebook” and “Application setup” under “Facebook.”
- In this section you need to connect a Facebook app created in developers.facebook.com/apps, with the following permissions with advanced access - pages_read_user_content, pages_manage_metadata, pages_manage_posts, pages_manage_engagement, pages_read_engagement, pages_messaging, pages_show_list, Business Asset User Profile Access.
- Then on the “Facebook pages” screen you can connect your Facebook page via the “Connect” button.
- A login dialog to Facebook will open in a new window.
- Fill in the login credentials and then click “Log in.”
- Next, a list with available Facebook pages will open.
- Select the Facebook page you want to connect and connect it with LiveAgent by clicking the “Connect” button.
- Now the Facebook page should be connected with LiveAgent.
- Head over to your Facebook page on Facebook.com
- Click on the “Send message” button and write any message to your Facebook page.
- Go back to LiveAgent’s “Tickets” menu item and your message will appear here in the form of a ticket.
- Open the ticket with your message and click the “reply” link at the bottom to respond to your message.
You can test it here:
- url: https://support.mycompany.com/agent
- username: support@mycompany.com
- password: LiveAgent007
このガイドの末尾にある VIDEO_FB_LA_fetching_messages.mp4 に近い内容の動画を自分で録画し、ファイルエリアに添付してください。Facebookのレビュー担当者は、一般的な動画のみの提出を受け付けていません。
テキストエリアに以下の文章を入力できます。
We need this permission because it is required by pages_manage_posts permission. We need it to create, edit and delete content posted on the page. Users that are logged in can post statuses to their connected page via the LiveAgent application. Only users that are logged in can post anything to Facebook.
- Click the “+” icon in the top right corner of the application screen.
- Select Compose Facebook post.
- Select which page you want to post on from the listbox (shown only if there are more pages.)
- Write whatever you want to share with your audience.
- Click Send.
You can test it here:
- url: https://support.mycompany.com/agent
- username: support@mycompany.com
- password: LiveAgent007
このガイドの末尾にある VIDEO_FB_LA_share-post-sub.mp4 に近い内容の動画を自分で録画し、ファイルエリアに添付してください。Facebookのレビュー担当者は、一般的な動画のみの提出を受け付けていません。
テキストエリアに以下の文章を入力できます。
We need this permission together with pages_manage_posts and also with pages_manage_engagement permission to delete posts and comments posted by other Pages or users. The LiveAgent application can connect with Facebook pages to fetch page posts, comments, and messages. After somebody writes a post, comment, or message to a Facebook page, it should appear in the LiveAgent application as a new ticket within a few seconds. Only users that are logged in can connect Facebook pages with LiveAgent.
- Inside LiveAgent, click “Configuration” on the left-hand side menu on the main application screen.
- From the “Configuration” screen click “Facebook” and “Application setup” under “Facebook.”
- In this section you need to connect a Facebook app created in developers.facebook.com/apps, with the following permissions with advanced access - pages_read_user_content, pages_manage_metadata, pages_manage_posts, pages_manage_engagement, pages_read_engagement, pages_messaging, pages_show_list, Business Asset User Profile Access.
- Then on the “Facebook pages” screen you can connect your Facebook page via the “Connect” button.
- A login dialog to Facebook will open in a new window.
- Fill in the login credentials and then click “Log in.”
- Next, a list with available Facebook pages will open.
- Select the Facebook page you want to connect and connect it with LiveAgent by clicking the “Connect” button.
- Now the Facebook page should be connected with LiveAgent.
- Head over to your Facebook page on Facebook.com
- Find any post on your page and try to write a comment.
- Go back to LiveAgent’s “Tickets” screen and you can now see your comment in the form of a ticket.
- Mark this ticket as selected and then delete it by pressing the “Delete” button.
You can test it here:
- url: https://support.mycompany.com/agent
- username: support@mycompany.com
- password: LiveAgent007
このガイドの末尾にある VIDEO_FB_LA_share-post-sub.mp4 に近い内容の動画を自分で録画し、ファイルエリアに添付してください。Facebookのレビュー担当者は、一般的な動画のみの提出を受け付けていません。
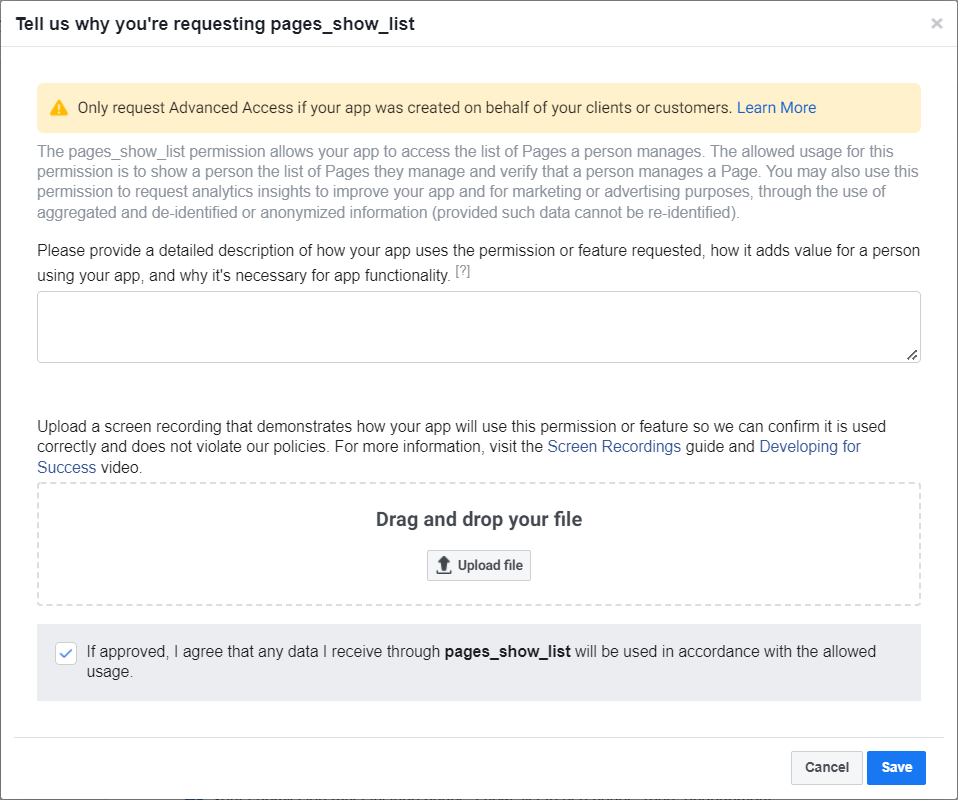
テキストエリアに以下の文章を入力できます。
We need this permission to read and display list of Pages a person manages to connect chosen one into LiveAgent application. The list of Pages should be displayed after a click on the connect button in the LiveAgent application. The LiveAgent application can connect with Facebook pages to fetch page posts, comments, and messages. After somebody writes a post, comment, or message to a Facebook page, it should appear in the LiveAgent application as a new ticket within a few seconds. Only users that are logged in can connect Facebook pages with LiveAgent.
- Inside LiveAgent, click “Configuration” on the left-hand side menu on the main application screen.
- From the “Configuration” screen click “Facebook” and “Application setup” under “Facebook.”
- In this section you need to connect a Facebook app created in developers.facebook.com/apps, with the following permissions with advanced access - pages_read_user_content, pages_manage_metadata, pages_manage_posts, pages_manage_engagement, pages_read_engagement, pages_messaging, pages_show_list, Business Asset User Profile Access.
- Then on the “Facebook pages” screen you can connect your Facebook page via the “Connect” button.
- A login dialog to Facebook will open in a new window.
- Fill in the login credentials and then click “Log in.”
- Next, a list with available Facebook pages will open.
- Select the Facebook page you want to connect and connect it with LiveAgent by clicking the “Connect” button.
- Now the Facebook page should be connected with LiveAgent.
You can test it here:
- url: https://support.mycompany.com/agent
- username: support@mycompany.com
- password: LiveAgent007
このガイドの末尾にある VIDEO_FB_LA_connect.mp4 に近い内容の動画を自分で録画し、ファイルエリアに添付してください。Facebookのレビュー担当者は、一般的な動画のみの提出を受け付けていません。
任意の権限
テキストエリアに以下の文章を入力できます。
LiveAgent application is not a chatbot, it is a tool for human operators to simplify communication with customers over multiple channels in one application. The LiveAgent application can connect with Facebook pages to fetch page posts, comments, and messages. Webhooks are used to fetch page messages. After somebody writes a post, comment, or message to a Facebook page, it should appear in the LiveAgent application as a new ticket within a few seconds. We need this permission to be able to reply to our messages within 7 days as the standard 24 hours limit is not enough. Only users that are logged in can connect Facebook pages with LiveAgent.
- Inside LiveAgent, click “Configuration” on the left-hand side menu on the main application screen.
- From the “Configuration” screen click “Facebook” and “Application setup” under “Facebook.”
- In this section you need to connect a Facebook app created in developers.facebook.com/apps, with the following permissions with advanced access - pages_read_user_content, pages_manage_metadata, pages_manage_posts, pages_manage_engagement, pages_read_engagement, pages_messaging, pages_show_list, Business Asset User Profile Access.
- Then on the “Facebook pages” screen you can connect your Facebook page via the “Connect” button.
- A login dialog to Facebook will open in a new window.
- Fill in the login credentials and then click “Log in.”
- Next, a list with available Facebook pages will open.
- Select the Facebook page you want to connect and connect it with LiveAgent by clicking the “Connect” button.
- Now the Facebook page should be connected with LiveAgent.
- Head over to your Facebook page on Facebook.com
- Click on the “Send message” button and write any message to your Facebook page.
- Go back to LiveAgent’s “Tickets” menu item and your message will appear here in the form of a ticket.
- Open the ticket with your message and click the “reply” link at the bottom to respond to your message.
You can test it here:
- url: https://support.mycompany.com/agent
- username: support@mycompany.com
- password: LiveAgent007
このガイドの末尾にある VIDEO_FB_LA_fetching_messages.mp4 に近い内容の動画を自分で録画し、ファイルエリアに添付してください。Facebookのレビュー担当者は、一般的な動画のみの提出を受け付けていません。
以上で完了です。あとはFacebookがアプリケーションを承認するまでお待ちください。承認されると、FacebookのウォールへのPost、メッセージ、コメントをチケットとして取得し、各チケットから直接返信できるようになります。Facebookからの回答には数日かかる場合があります。保留中のリクエストは、Facebook開発者パネルの “App Review > Requests” セクションで確認できます。
添付の動画はYouTubeでも公開されています。
最後の動画では、連携済みのFacebookページへのメッセージ、コメント、投稿への返信方法のプレビューも確認できます。
残念ながら、Facebookのレビューチームは一般的な動画の受付を停止しており、独自のスクリーンキャスト動画を録画してアプリレビューに提出することが必要です。Facebookはスクリーンキャストの録画に関するガイドを公開していますので、審査を通過するためにはその推奨事項に従うことをお勧めします。
レビューの通過にお困りの場合は、LiveAgentのインストールを弊社クラウドへ移行し、Facebookアプリケーションのレビューに関する煩わしい作業を弊社に任せるというオプションも検討されることをお勧めします。カスタマイズされたご提案についてはお気軽にお問い合わせ(www.liveagent.jp)ください。メールまたはオンラインチャットにて営業チームがご対応いたします。

